 English
 русский
 عربى
عربىHow does the assembly process of tile prefabricated kitchen work?
The rise of modular and prefabricated solutions has significantly influenced modern kitchen design. Among these innovations, the tile prefabricated kitchen stands out for its combination of functionality, durability, and ease of installation.
Understanding Tile Prefabricated Kitchen
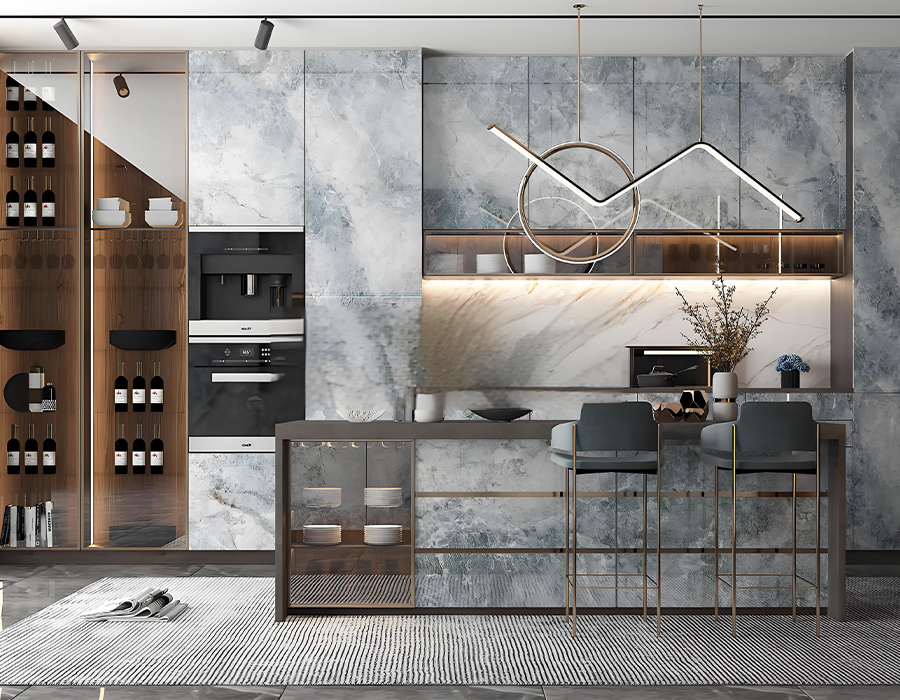
A tile prefabricated kitchen refers to a kitchen system where major components such as cabinets, countertops, panels, and tiles are pre-manufactured and delivered to the installation site ready for assembly. Unlike traditional kitchen construction, which requires onsite fabrication, prefabricated kitchens streamline installation, reduce labor requirements, and maintain consistent quality across units.
Key components typically include:
- Cabinet modules: Pre-assembled base and wall cabinets.
- Worktops: Tiles affixed to pre-cut panels or slabs.
- Backsplash panels: Decorative and functional tiled surfaces.
- Hardware: Hinges, handles, and fasteners pre-selected to match module dimensions.
- Plumbing and electrical provisions: Pre-cut holes or channels for pipes, wiring, and appliances.
The tile prefabricated kitchen allows flexibility in design, often accommodating standard kitchen layouts such as L-shaped, U-shaped, or galley kitchens while ensuring rapid assembly at the site.
Advantages of Tile Prefabricated Kitchen Assembly
Before delving into the assembly process, it is important to highlight why many buyers and industry professionals prefer tile prefabricated kitchen solutions:
- Time efficiency: Since modules are pre-fabricated, installation time is significantly reduced compared to traditional kitchen construction.
- Consistent quality: Factory fabrication ensures uniformity in tile placement, panel cutting, and module alignment.
- Reduced onsite labor: Skilled installation teams can focus on module assembly rather than custom fabrication.
- Customizable design: Modules and tiles are designed to be combined in different configurations to meet spatial and aesthetic requirements.
- Ease of maintenance: Properly assembled prefabricated kitchens minimize gaps and uneven surfaces, facilitating cleaning and upkeep.
Understanding these advantages provides context for why precise assembly methods are critical for maximizing the performance and appearance of tile prefabricated kitchen.
Pre-Assembly Preparation
Successful assembly begins with thorough preparation. Skipping or rushing this phase can lead to installation errors, uneven surfaces, or structural issues. Key preparatory steps include:
- Site inspection: Check floor level, wall alignment, and plumbing/electrical positioning to ensure compatibility with pre-fabricated modules.
- Component verification: Confirm that all cabinet modules, tiles, hardware, and accessories match the design specifications.
- Tool preparation: Essential tools include screwdrivers, drills, measuring tape, spirit levels, rubber mallets, and safety equipment.
- Protective measures: Floors and walls should be protected from scratches or debris during installation.
Tip: Maintaining an organized layout of all modules before assembly simplifies the process and prevents damage to delicate tiles.
Step-by-Step Assembly Process
The assembly of tile prefabricated kitchen involves several sequential steps, from positioning cabinets to securing tiles and integrating appliances.
1. Installing Base Cabinets
The foundation of any kitchen is the base cabinet assembly. Proper installation ensures stability and accurate alignment for the rest of the kitchen:
- Position the modules according to the layout plan, maintaining even spacing and alignment with walls.
- Level the cabinets using adjustable legs or shims. Leveling is critical to avoid uneven countertops and misaligned tiles.
- Secure cabinets to the wall using pre-drilled mounting holes and appropriate fasteners. For tile prefabricated kitchen, the backing wall should be prepared to support cabinet weight.
Important: Ensure that plumbing connections for sinks and appliances are accessible before final fastening.
2. Installing Wall Cabinets
Wall cabinets provide storage and contribute to the visual balance of the kitchen:
- Measure height and spacing accurately to align with base cabinets.
- Secure wall cabinets using appropriate anchors for the wall type (concrete, brick, or drywall).
- Check for level and plumb alignment; slight adjustments may be necessary before fastening.
Wall cabinets in tile prefabricated kitchen often include pre-tiled surfaces or protective coverings to prevent damage during assembly.
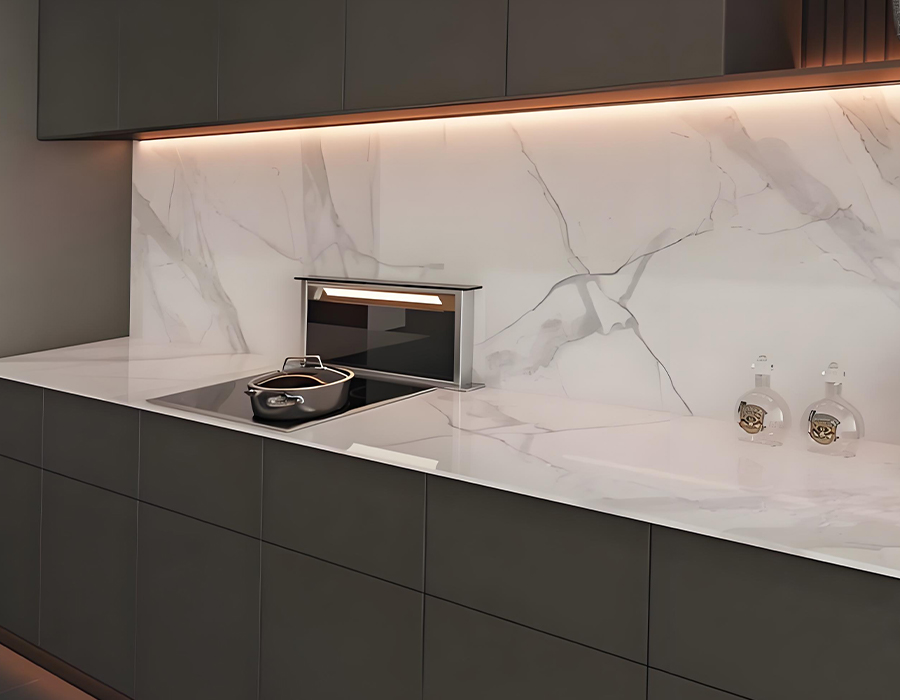
3. Countertop and Tile Installation
The countertop is a defining feature of tile prefabricated kitchen aesthetics and functionality. Depending on design, tiles may be pre-applied or installed onsite:
- Position countertop panels on base cabinets and check alignment with walls.
- Secure panels using screws or adhesive suitable for tile and substrate materials.
- Seal gaps between countertop edges and walls with silicone or tile-compatible sealants.
- Backsplash tiles may be installed next, aligned with countertop tiles for seamless integration.
Tip: Consistent grout lines and proper sealing are essential to prevent moisture infiltration and maintain durability.
4. Hardware and Accessories
Once major modules and surfaces are in place, the next step involves attaching handles, knobs, hinges, and other accessories:
- Pre-drilled holes in cabinets facilitate accurate placement of hardware.
- Adjust hinges to ensure doors open smoothly and align with adjacent panels.
- Install accessories such as drawer slides, corner racks, and organizers to complete functionality.
5. Plumbing and Electrical Integration
A properly assembled tile prefabricated kitchen must accommodate sinks, appliances, and lighting:
- Connect plumbing to sink units and verify leak-free connections.
- Integrate electrical wiring for built-in ovens, cooktops, and lighting fixtures.
- Test all systems to ensure proper operation before final finishing.
6. Final Inspection and Finishing Touches
The final stage involves checking the overall assembly quality and addressing minor adjustments:
- Check alignment of all cabinets, tiles, and panels.
- Inspect grout lines and caulking for uniformity.
- Clean surfaces to remove dust, adhesive residue, or fingerprints.
- Verify door and drawer functionality, ensuring smooth operation and proper closures.
Final inspection ensures that the tile prefabricated kitchen is not only visually appealing but also structurally secure and fully functional.
Common Challenges in Tile Prefabricated Kitchen Assembly
Even with detailed instructions, certain challenges may arise during assembly:
- Uneven walls or floors may require additional shimming or adjustment.
- Tile misalignment if modules are not carefully leveled.
- Improper hardware installation leading to doors that do not close properly.
- Incorrect plumbing or electrical connections that require rework.
Awareness of these challenges allows installers to proactively address issues, ensuring a smooth assembly process.
Tips for Successful Assembly
- Follow the manufacturer’s layout plan carefully to avoid module misplacement.
- Use a spirit level for every major component to maintain precise alignment.
- Handle tiles with care to avoid chips or cracks during installation.
- Double-check plumbing and electrical measurements before fastening panels.
- Clean as you go to maintain a professional installation environment.
By adhering to these tips, the installation of tile prefabricated kitchen can be efficient, accurate, and durable.
Summary
The assembly of tile prefabricated kitchen is a systematic process that begins with site preparation, continues through cabinet and countertop installation, and concludes with hardware integration and final inspection. By understanding each step, addressing potential challenges, and following professional guidelines, homeowners and installers can ensure that the prefabricated kitchen delivers both functional and aesthetic benefits.
Frequently Asked Questions (FAQs)
Q1: How long does it take to assemble a tile prefabricated kitchen?
Assembly typically takes 1–3 days depending on kitchen size, complexity, and installer experience.
Q2: Can tile prefabricated kitchen be installed in irregular spaces?
Yes, modular designs and customizable modules allow adaptation to small or unconventional layouts.
Q3: Are the tiles on prefabricated kitchens durable?
Yes, tiles used in prefabricated kitchens are selected for durability, stain resistance, and ease of maintenance.
Q4: Is professional installation recommended?
Professional installation is recommended to ensure precise alignment, secure plumbing/electrical integration, and optimal functionality.
Q5: Can damaged tiles be replaced after assembly?
Yes, most tile prefabricated kitchens allow for individual tile replacement without dismantling the entire kitchen.
-
 What Are the Key Benefits of Using PEC Wall Panels in Prefabricated Kitchen Pods?
Introduction: Revolutionizing Kitchen Construction with Integrated Solutions The construct...
READ MORE -
 What Are the Key Benefits of Using PEC Wall Panels in Prefabricated Kitchen Pods?
1. Introduction In modern construction and interior design, walls are no longer just for d...
READ MORE -
 What Are the Key Benefits of Using PEC Wall Panels in Prefabricated Kitchen Pods?
Introduction The construction and interior design industries have witnessed a remarkable s...
READ MORE -
 What Are the Key Benefits of Using PEC Wall Panels in Prefabricated Kitchen Pods?
What is a PEC Wall Prefabricated Kitchen and Why is it a Game-Changer? The modern housing ...
READ MORE

-
 16 Jul, 2026
 -
10 Jul, 2026
-
09 Jul, 2026
-
07 Jul, 2026
-
02 Jul, 2026
-
24 Jun, 2026

Copyright © 2025 Jiangsu Kounor Home Technology Co., Ltd.
All Rights Reserved.
Custom Prefabricated Restroom Building, Prefabricated Kitchenette Suppliers
